For Architects
From idea to presentation in minutes, not hours.
Develop architectural concepts faster. Start with text or a concept image, generate an editable floor plan and 3D view, then create and refine renders for your client presentation.
Your workflow, connected
Your idea. An editable design. A presentation.
- 01
Describe or upload
Write your brief or upload a concept image, floor plan, or sketch.
- 02
Develop the plan in 3D
Generate an editable floor plan, refine the layout, and explore the 3D view.
- 03
Render and refine
Create renders, edit selected areas, and explore lighting and preset styles.
- 04
Present and share
Create presentation boards and visual formats for clients and social media.
- 05
Continue in CAD
Export DWG or DXF to develop the concept in your usual design software.
01 / Start the concept
A few words. A reference image. An editable starting point.
Schematic design is where you explore the first layout and design direction. FloorPlan AI helps you get that concept on screen quickly, so you can start making design decisions.
Start from text
Describe the rooms, approximate size, and how spaces should connect, or enter the brief in the guided requirements form.
Start from an image
Upload a photo or image of your concept, a reference floor plan, or a sketch to guide the initial layout.
Example text brief
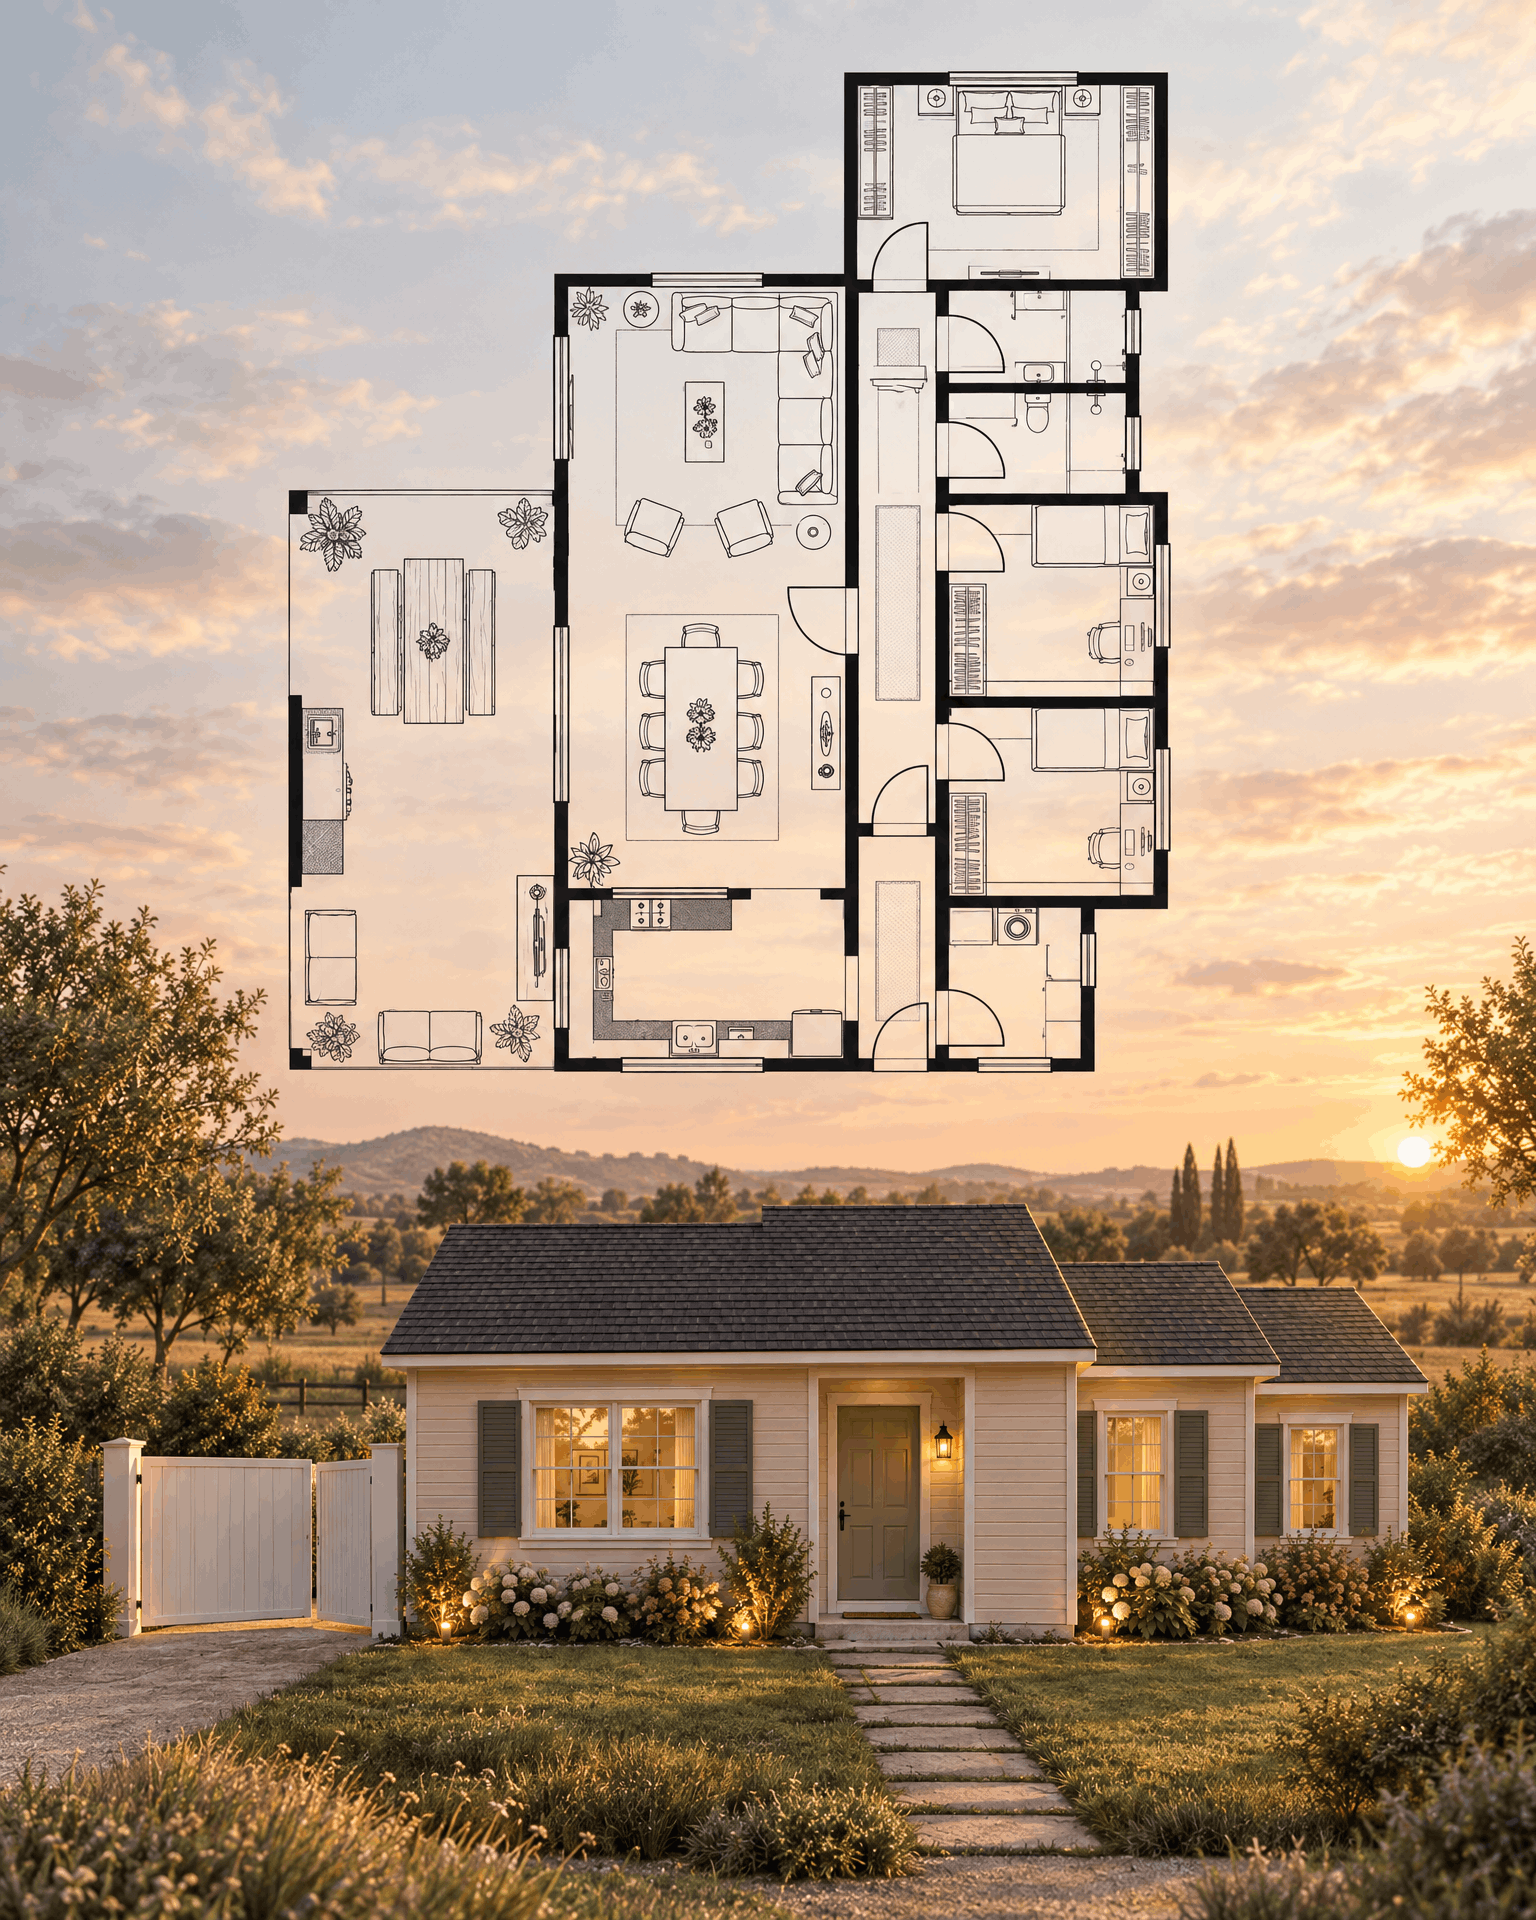
“A single-story home with three bedrooms, two bathrooms, open-plan living, and a patio connected to the kitchen and dining area.”
Develop the plan. Explore it in 3D.
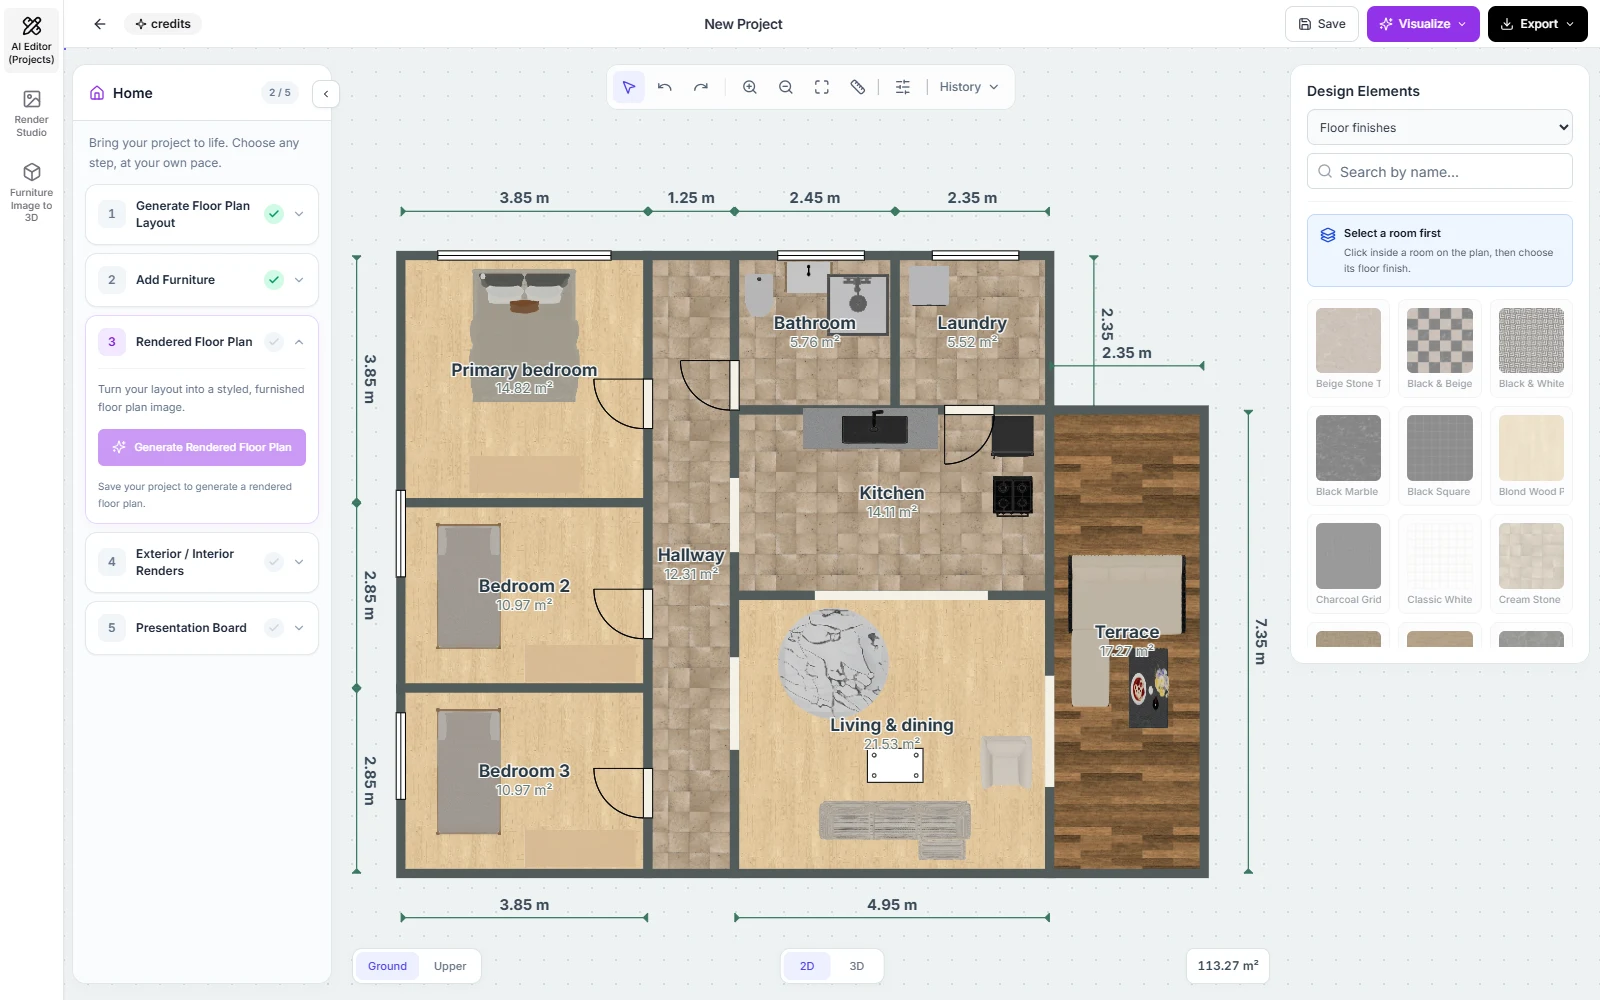
- Edit walls, doors, windows, dimensions, and furniture.
- Review room relationships and circulation.
- Explore the 3D view and choose perspectives for rendering.
02 / Create architectural renders
Turn the concept into a place your client can picture.
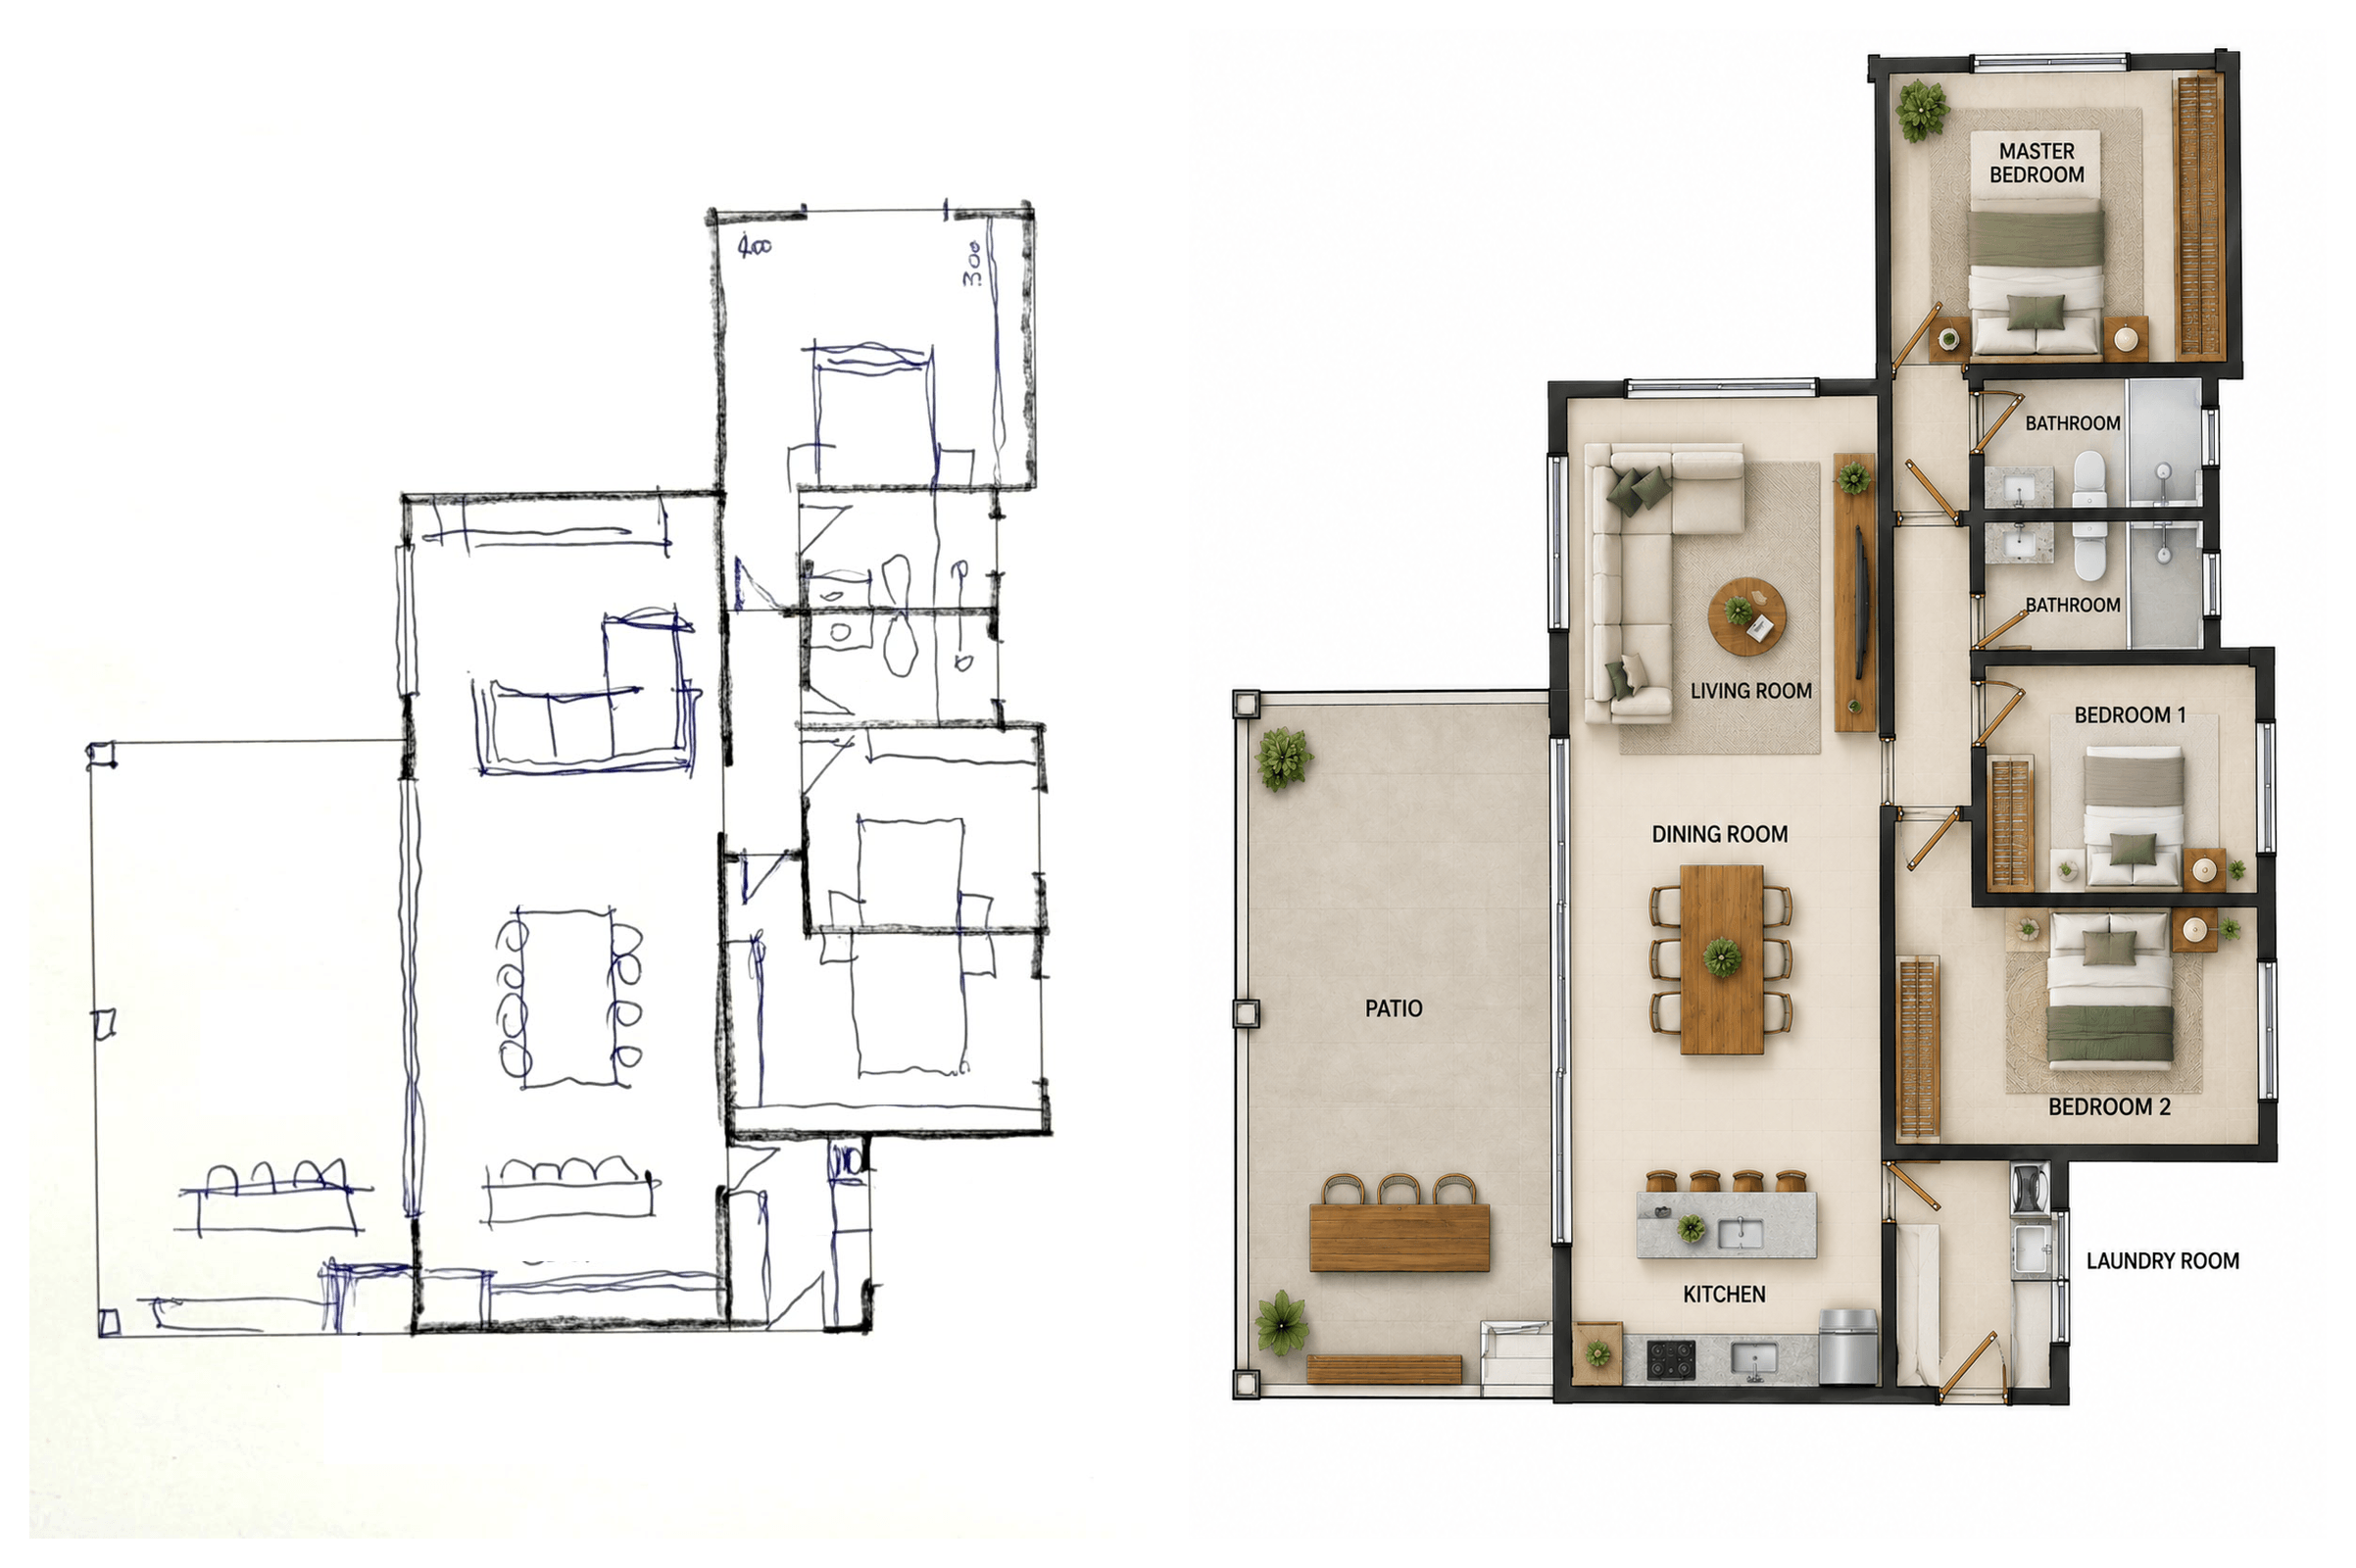
Create interior and exterior renders from your project’s 3D views, sketches, or reference images. Explore the materials, lighting, and atmosphere before developing the next design direction.
Use the same visual workflow for a facade study, an interior concept, a sketch-to-render exploration, or a new view of the project.
Create an architectural render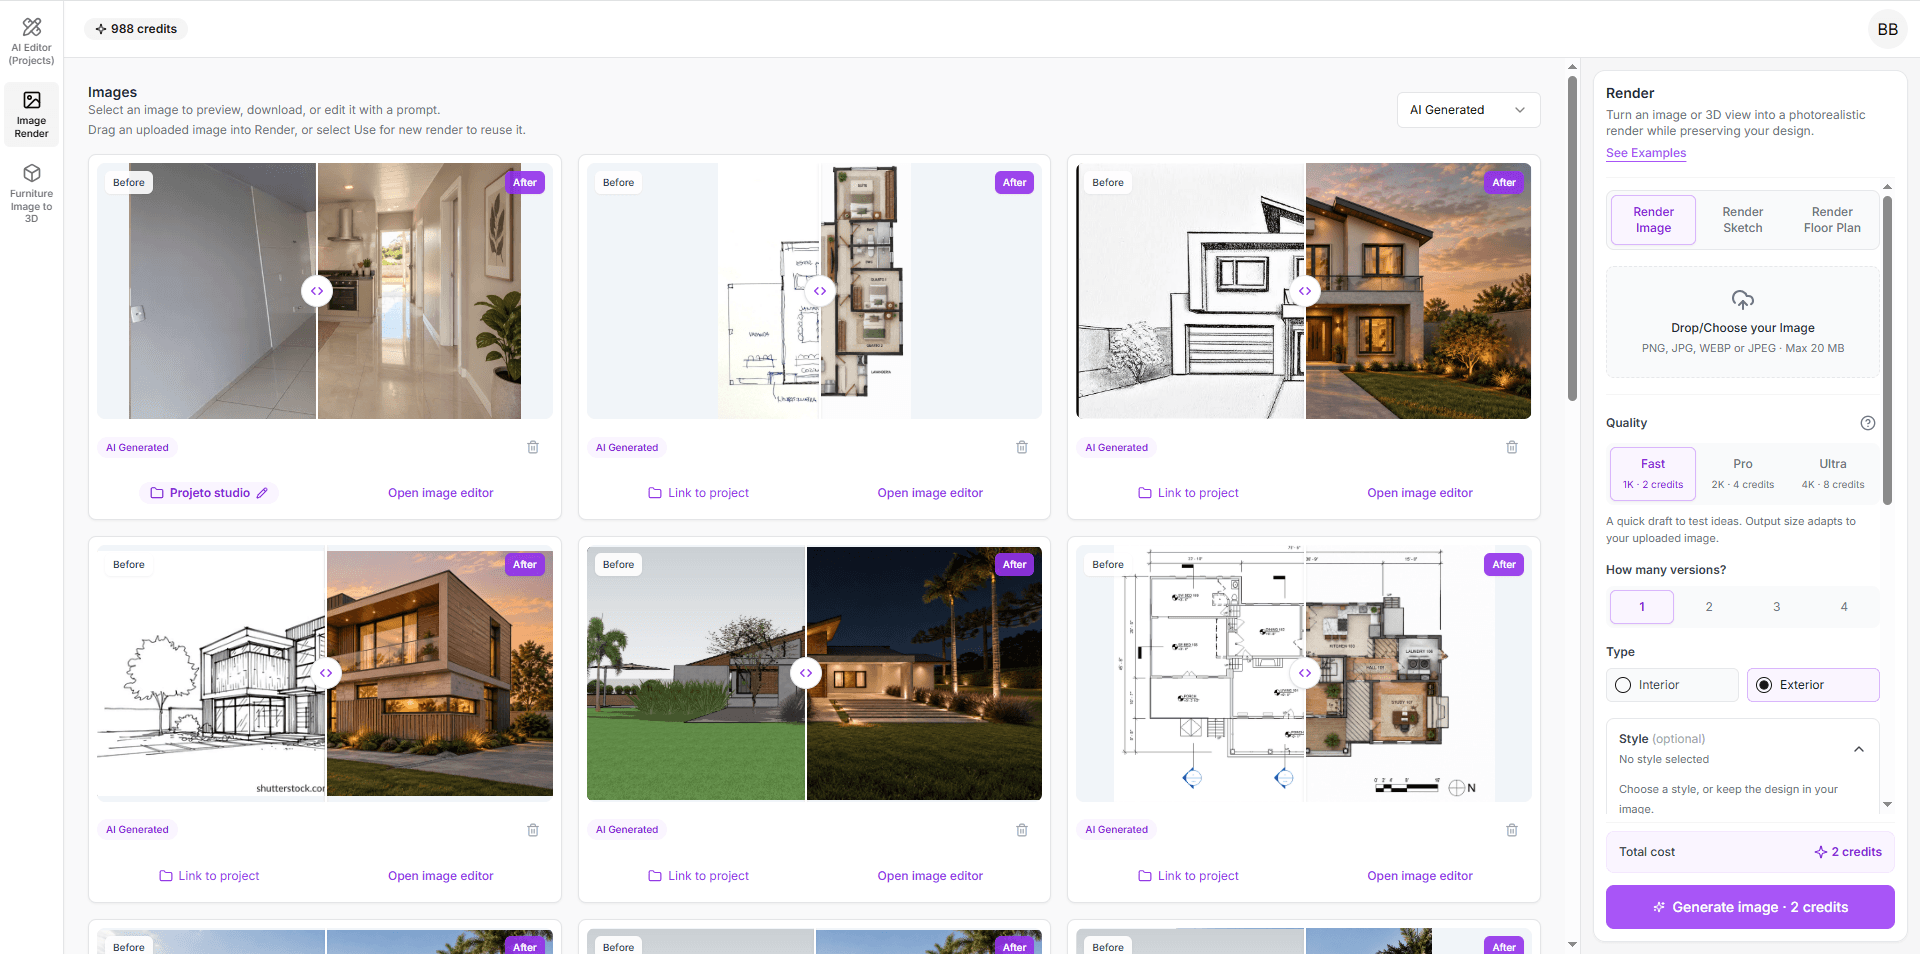
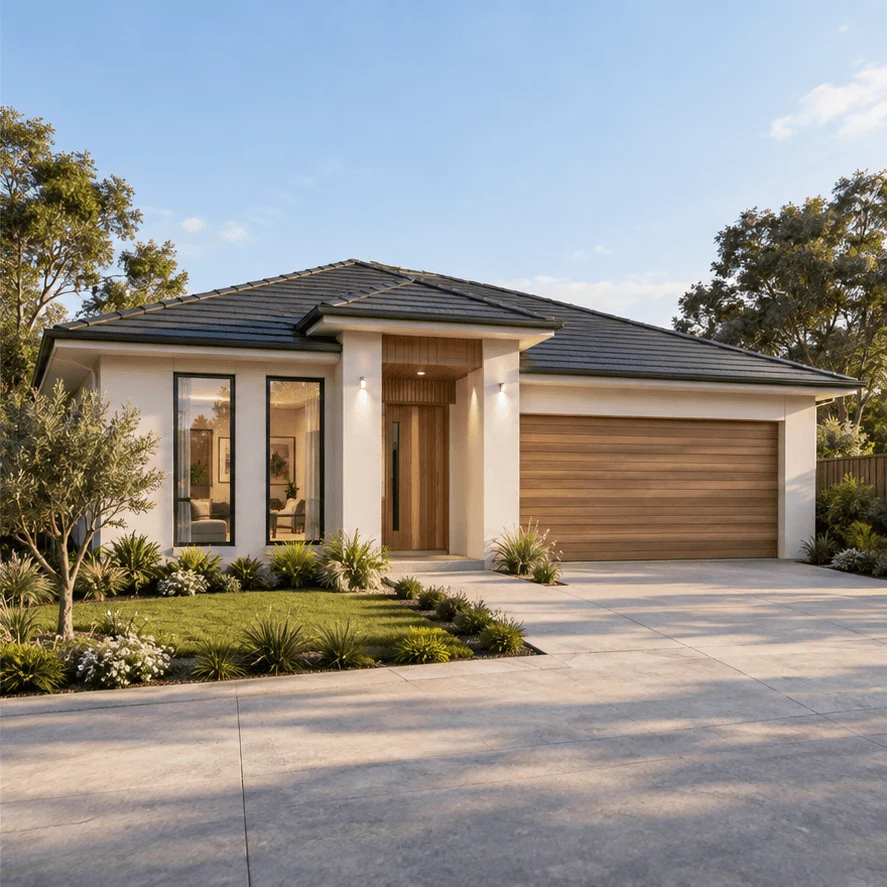
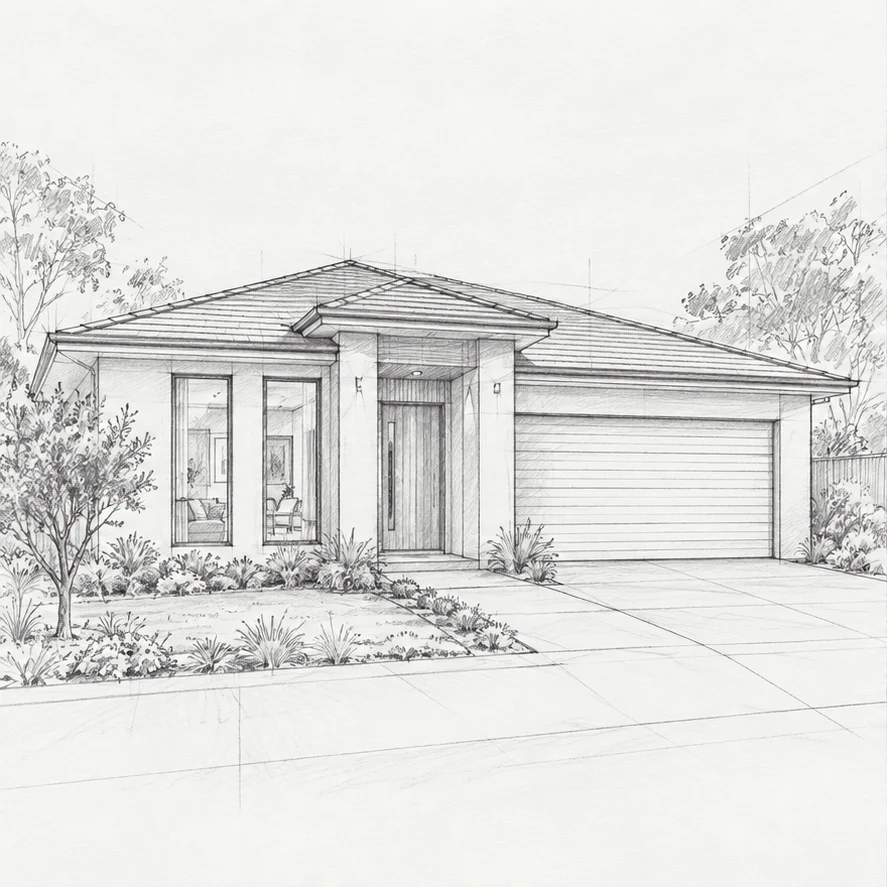
Example sketch-to-render study. Drag the divider or use the arrow keys to compare.
Keep exploring while the idea is still flexible.
- Turn a sketch or a 3D view into an architectural visualization.
- Describe the materials, finishes, and mood you want to explore.
- Create alternatives to support the client discussion.
03 / Refine the render
Change the details that matter.
Select specific areas of a render and describe what you want to change. Explore a different facade finish, adjust a material, or refine an interior detail without starting the visual discussion from scratch.
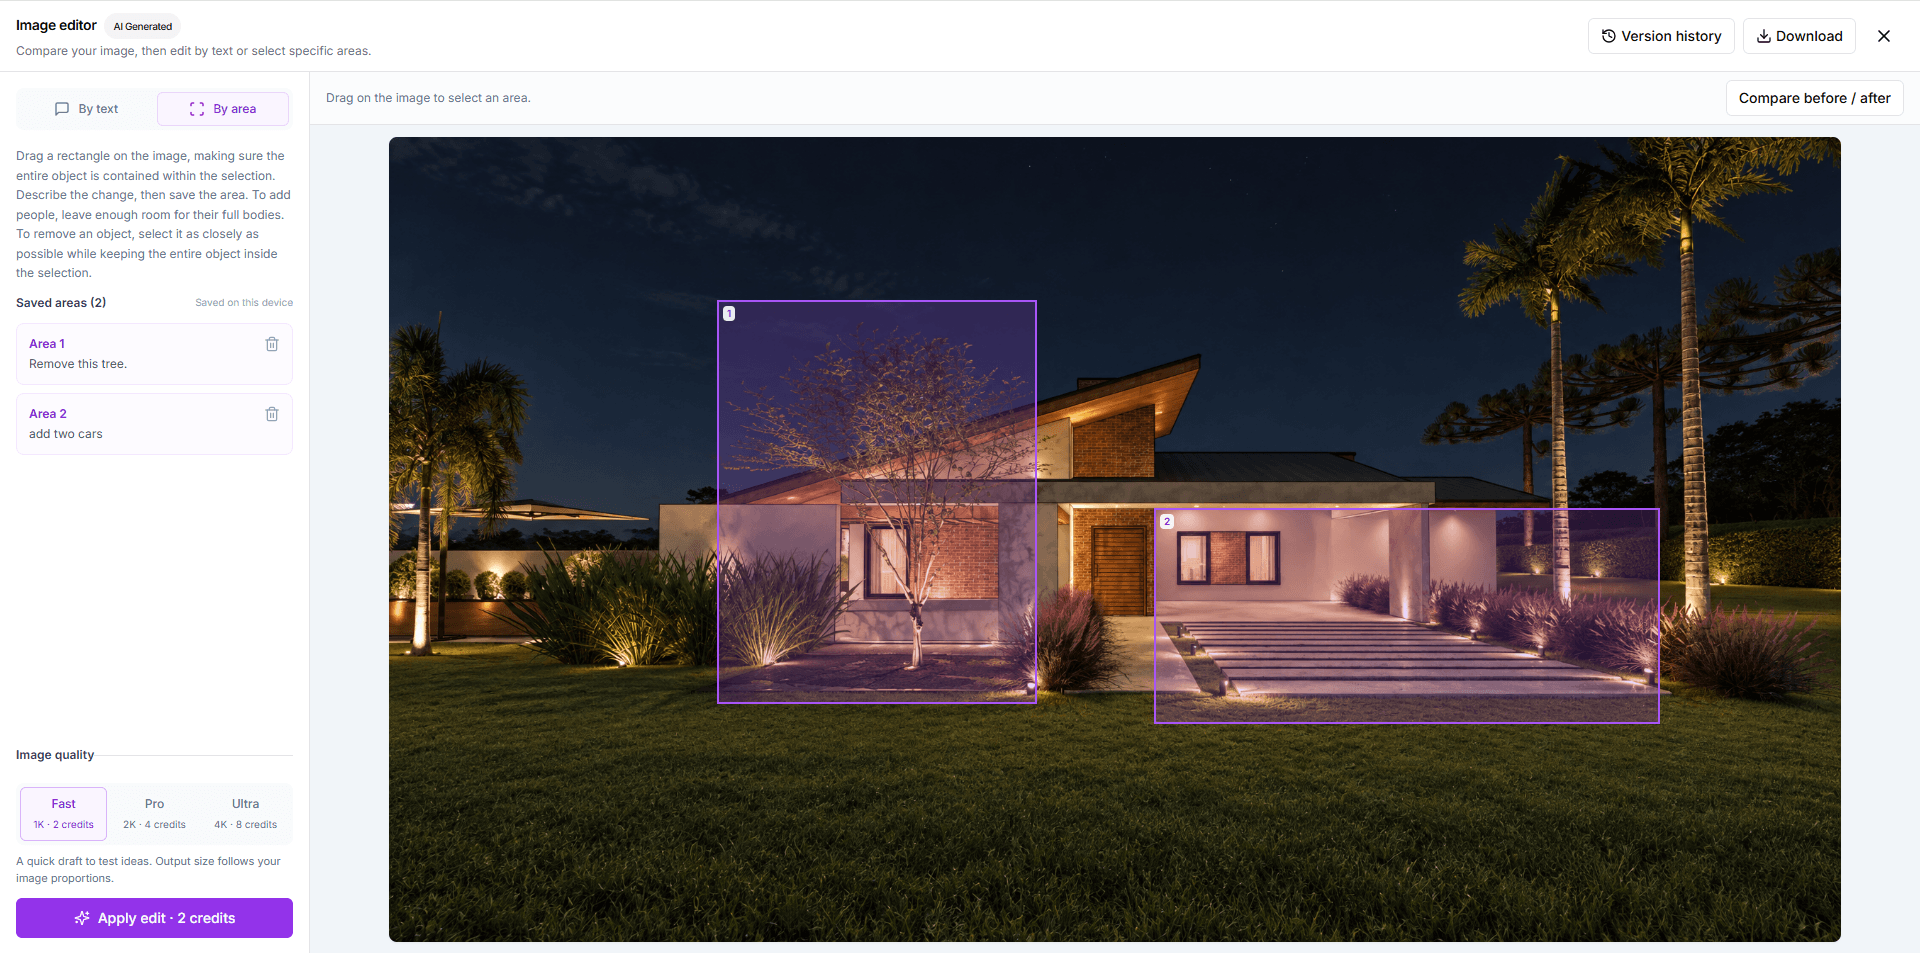
Edit selected areas
Mark the parts of the image you want to refine and give each area a clear edit instruction.
Change the lighting
Explore midday, sunset, and night lighting to communicate a different atmosphere.
Choose a preset style
Use predefined architectural styles as a starting point, then guide the materials and finishes with your own description.
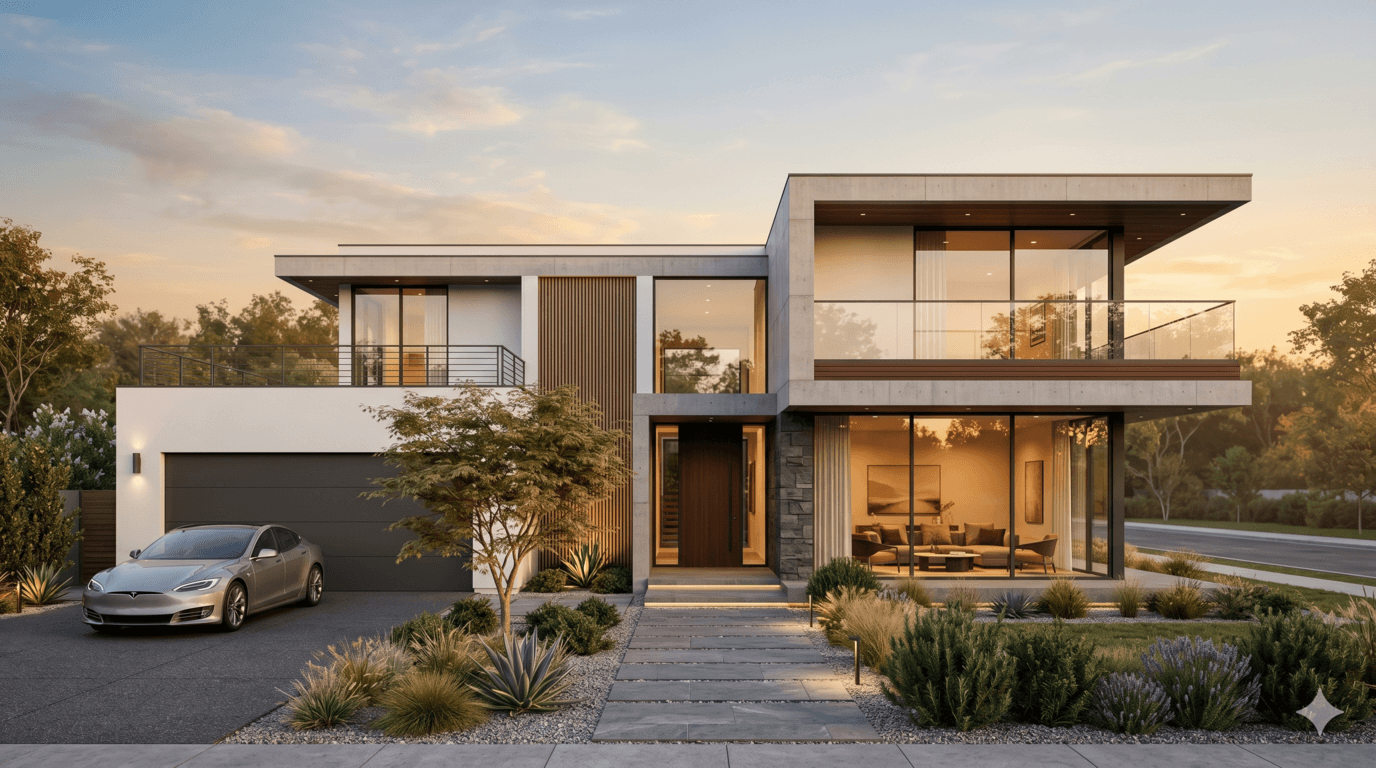
Modern Minimalist
Clean lines and a restrained material palette.
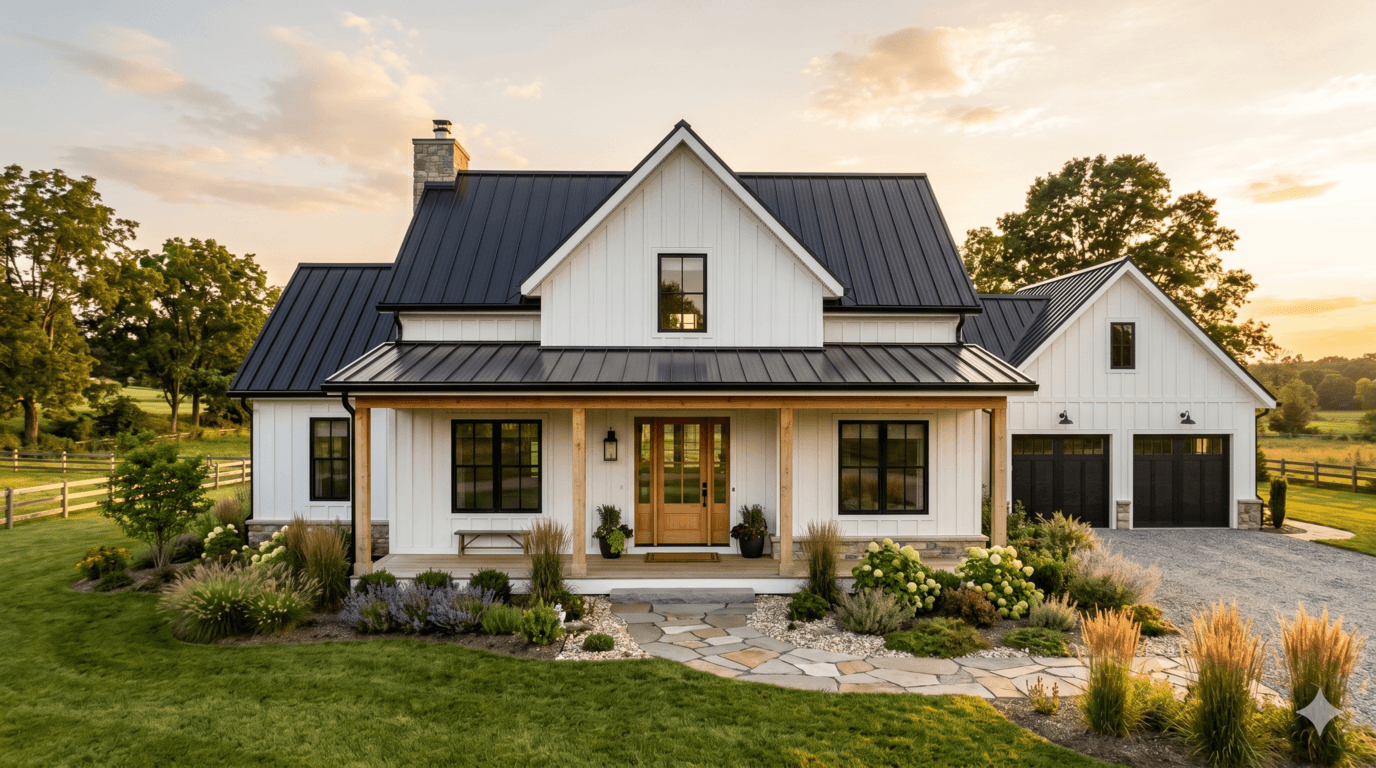
Modern Farmhouse
Familiar forms with warm, contemporary finishes.
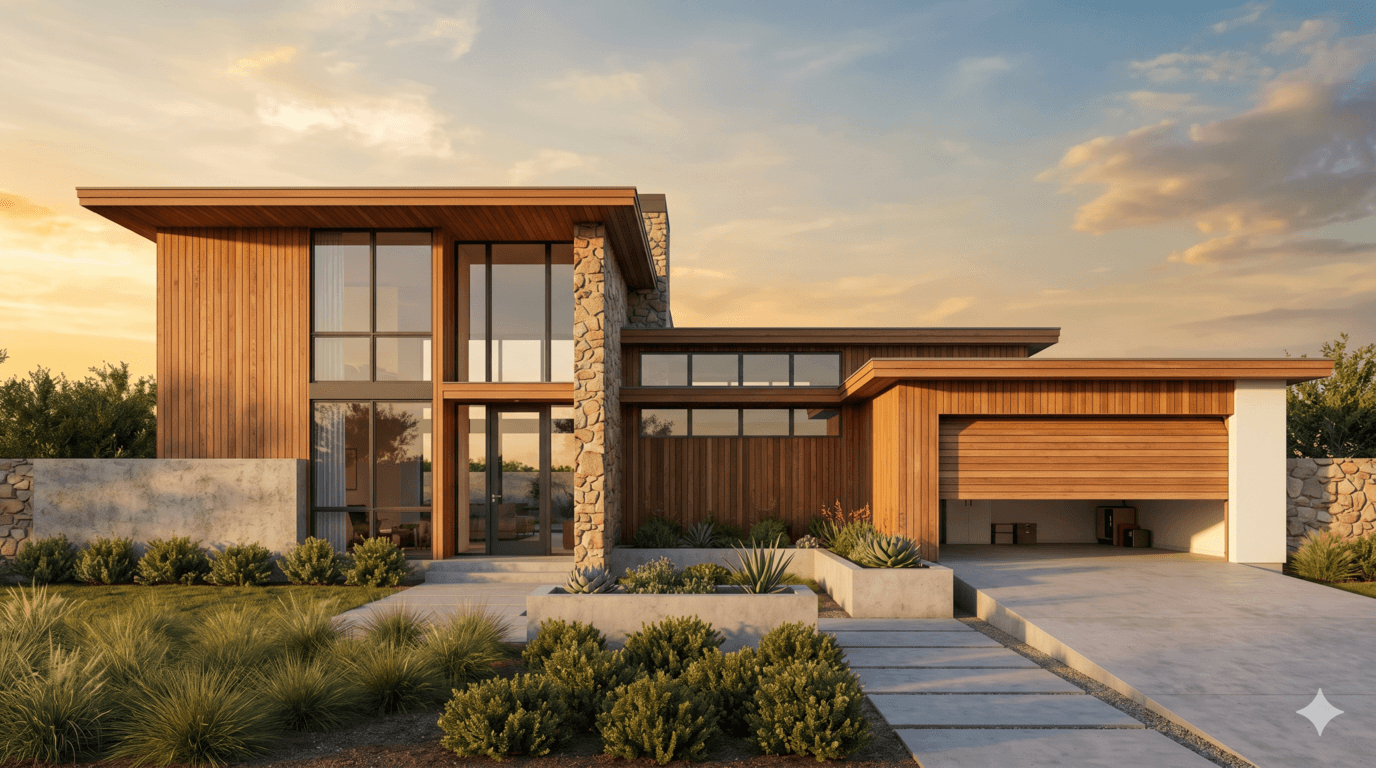
Mid-Century Modern
Horizontal lines, natural materials, and open living.

Scandinavian
Light finishes, timber, and a simple architectural expression.
Preset style examples shown in separate projects.
04 / Rendered floor plans
Make the layout as clear as the render.
Once the editable layout is ready, generate a rendered floor plan with furniture, textures, and material cues. Give clients a top-down view that connects the room images to the overall design.
- Show how the rooms connect and where furniture fits.
- Communicate floor finishes and the use of each space.
- Use the rendered plan alongside the 3D views and architectural renders.
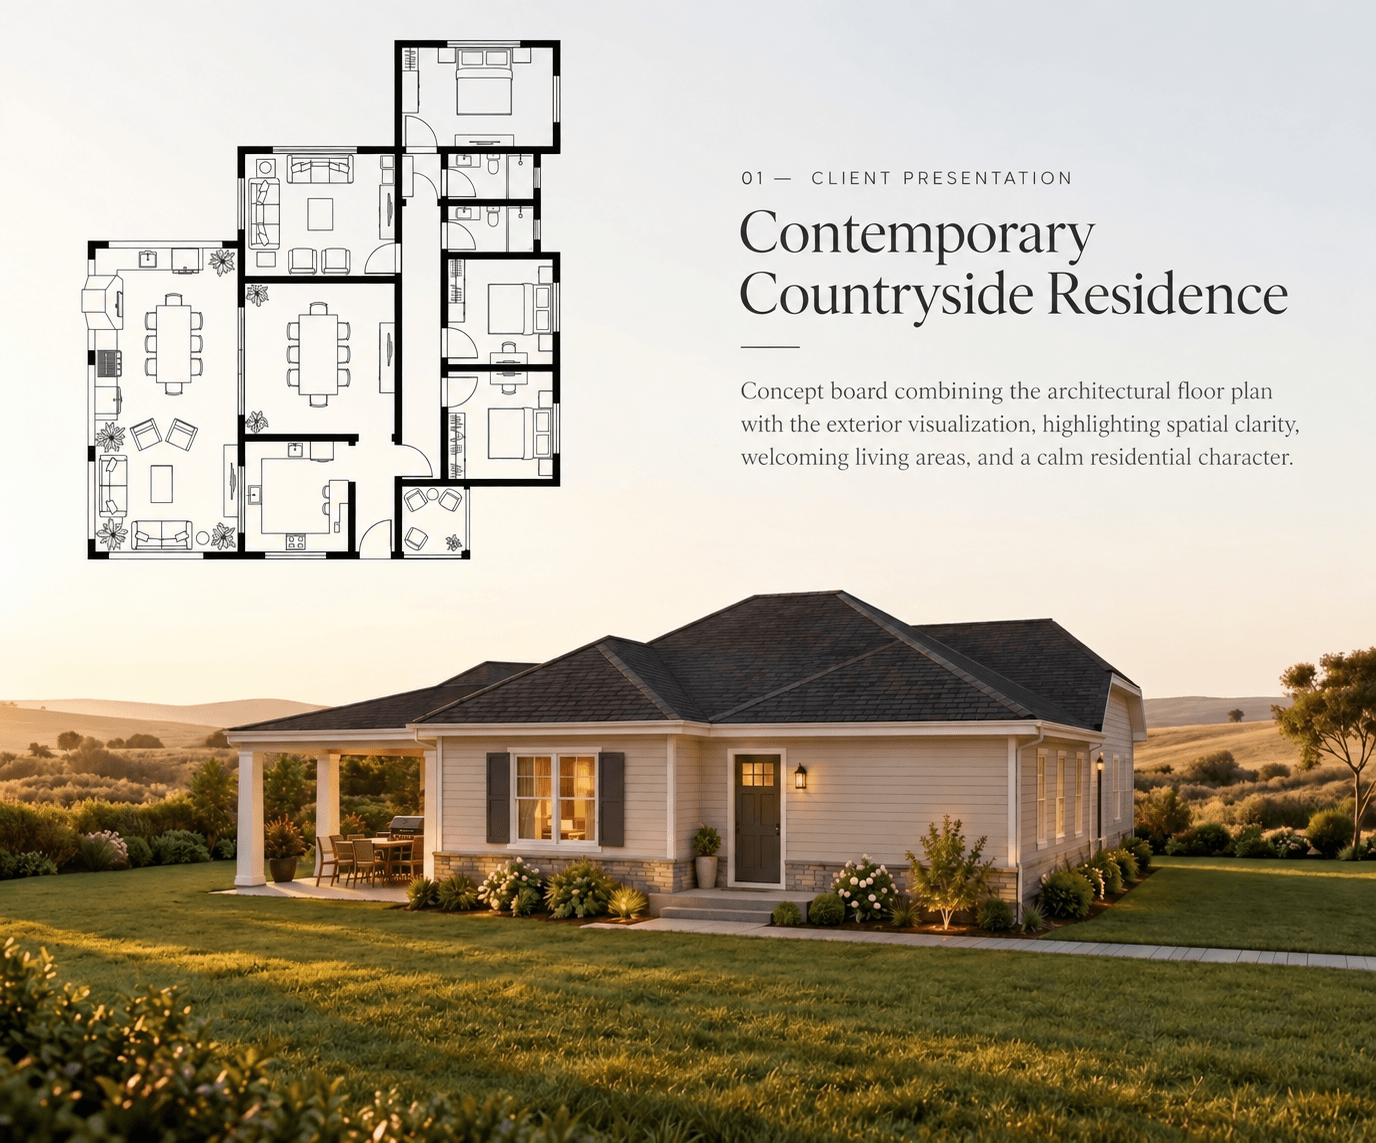
05 / Presentation boards
Bring the whole project into one visual story.
Combine your floor plan, renders, and concept text in a presentation board. Edit the title, typography, colors, and image composition to explain the project in your own voice.
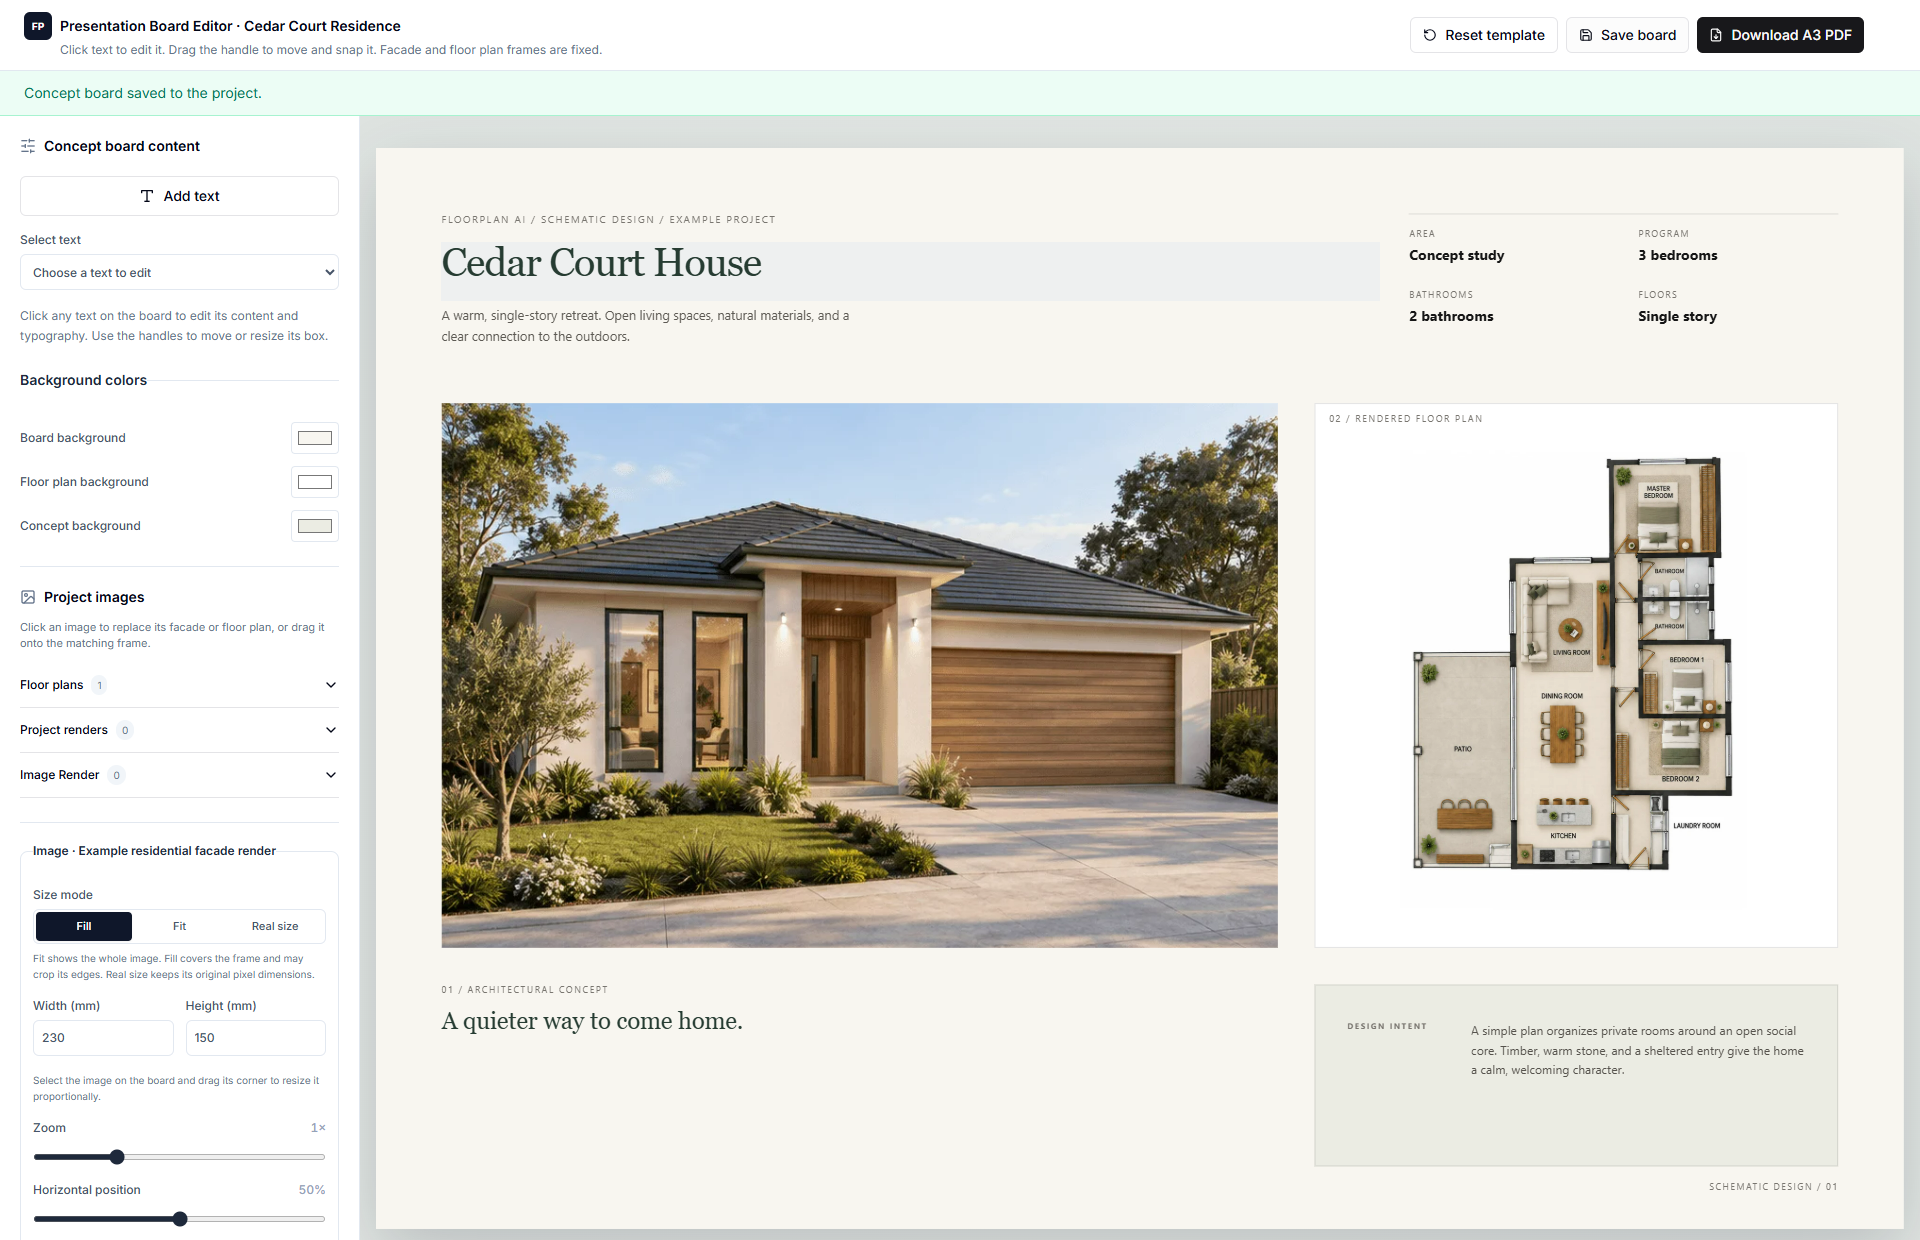
Ready for the client conversation.
- Present the architectural concept and rendered floor plan together.
- Add your project title, design intent, and key information.
- Refine the board in the editor and download an A3 PDF.
Client presentations & social media
One project. More ways to show it.
Create a landscape board for a design review and portrait presentation visuals for your studio’s social content. Bring the plan and renders together in a format that fits the story.
- Landscape layouts for project presentations and client meetings.
- Portrait visuals for Instagram posts, carousels, and stories.
- Images to use in TikTok photo posts, video covers, or project showcases.
Use the exported visuals in your usual social publishing tools.
06 / Continue in your design tools
Keep the concept moving with DWG and DXF.
Export the edited floor plan as a CAD drawing and continue modeling, detailing, and documenting the project in the software your practice already uses.
Explore CAD exportAutoCAD
Open the exported DWG or DXF and continue drawing and detailing.
SketchUp
Import the CAD drawing in a supported edition as a starting point for further modeling.
Revit
Import or link the CAD drawing as a reference for developing your Revit model.
Archicad
Open or place the DWG/DXF drawing to continue the project in your Archicad workflow.
Explore the tools
A focused toolkit for architects
Editable plans & 3D
Turn text, requirements, or reference images into a layout you can develop.
Explore featureArchitectural renders
Visualize the design, refine selected areas, and explore lighting and styles.
Explore featureRendered floor plans
Add materials and furniture to a clear top-down project presentation.
Explore featurePresentation boards
Bring the plan, renders, and design story together for your client.
Explore featureInterior visualization
Show how spaces, materials, and furniture work together inside the project.
Explore featureDWG & DXF export
Continue the drawing in AutoCAD, SketchUp, Revit, Archicad, and other CAD workflows.
Explore featureA few helpful answers
Before you start
How does FloorPlan AI help with schematic design?
It helps you quickly develop and communicate early architectural concepts. Start with text or an image, generate a floor plan, refine the editable layout, explore it in 3D, and create renders and presentation boards for the client conversation.
Can I generate an editable floor plan and 3D from text or an image?
Yes. Describe the project, use the guided requirements form, or upload a floor plan, sketch, or concept image. Generate the starting layout, edit walls, openings, dimensions, and furniture, and explore the plan in 3D.
Can I edit specific parts of a render?
Yes. Open a render in the image editor, select the areas you want to change, and describe the requested edits. You can also guide the overall image with text, choose lighting such as midday, sunset, or night, and explore predefined architectural styles.
Can I create rendered floor plans and presentation boards?
Yes. Generate a furnished, rendered floor plan and create a project presentation using your plan and renders. In the board editor, customize the text, typography, colors, and image composition. Use landscape presentations for client reviews and portrait visuals when preparing social media content.
Can I prepare visuals for Instagram and TikTok?
Yes. Create portrait presentation visuals that bring the plan and renders together, then use those images when preparing Instagram posts or slides and TikTok photo posts or video covers in your usual publishing tools.
How do DWG and DXF fit into my existing workflow?
Export the edited floor plan as DWG or DXF. Open the drawing in AutoCAD, import it into a supported SketchUp edition, or use it as a CAD reference in Revit or Archicad. Continue modeling, detailing, and documentation in those applications.
Your next project starts here
Bring a clearer concept to your next client meeting.
Start with a brief or an image. Develop the floor plan, explore it in 3D, refine the renders, and present your architectural idea.
Create your first concept